SpringSecurity和Shiro学习整理
认识SpringSecurity
Spring Security 是针对Spring项目的安全框架,也是Spring Boot底层安全模块默认的技术选型,他可以实现强大的Web安全控制,对于安全控制,我们仅需要引入 spring-boot-starter-security 模块,进行少量的配置,即可实现强大的安全管理!
记住几个类:
WebSecurityConfigurerAdapter:自定义Security策略
AuthenticationManagerBuilder:自定义认证策略
@EnableWebSecurity:开启WebSecurity模式
Spring Security的两个主要目标是 “认证” 和 “授权”(访问控制)。
用户认证和授权
-
引入 Spring Security 模块
1
2
3
4<dependency>
<groupId>org.springframework.boot</groupId>
<artifactId>spring-boot-starter-security</artifactId>
</dependency> -
编写 Spring Security 配置类
1
2
3
4
5
6
7
8
9
10
11
12
13
14
15
16
17
18
19
20
21
22
23
24
25
26
27
28
29
30
31
32
33
34
35
36
37
38
39
40
41
42
43
44
45
46
47
48
49
package com.kuang.config;
import org.springframework.security.config.annotation.authentication.builders.AuthenticationManagerBuilder;
import org.springframework.security.config.annotation.web.builders.HttpSecurity;
import org.springframework.security.config.annotation.web.configuration.EnableWebSecurity;
import org.springframework.security.config.annotation.web.configuration.WebSecurityConfigurerAdapter;
import org.springframework.security.crypto.bcrypt.BCryptPasswordEncoder;
/**
* TODO
*
* @ClassName Security
* @Author Alfa
* @Data 2022/7/11 11:51
* @Version 1.0
**/
//AOP
public class SecurityConfig extends WebSecurityConfigurerAdapter {
// 链式编程
// 授权
protected void configure(HttpSecurity http) throws Exception {
// 首页所有人可以访问,功能页只有对应有权限的人才能访问
// 请求授权的规则
http.authorizeRequests()
.antMatchers("/").permitAll()
.antMatchers("/level1/**").hasRole("vip1")
.antMatchers("/level2/**").hasRole("vip2")
.antMatchers("/level3/**").hasRole("vip3");
// 没有权限会默认到登陆页面,需要开启登陆的页面
http.formLogin();
}
// 认证,spring boot2.1.x可以直接使用
// 密码编码:PassWordEncoder
// 在springSecurity5.0+新增了很多的加密方式
protected void configure(AuthenticationManagerBuilder auth) throws Exception {
// 这些数据正常应该从数据库读
auth.inMemoryAuthentication().passwordEncoder(new BCryptPasswordEncoder())
.withUser("kuangshen").password(new BCryptPasswordEncoder().encode("123456")).roles("vip2","vip3")
.and()
.withUser("root").password(new BCryptPasswordEncoder().encode("123456")).roles("vip1","vip2","vip3")
.and()
.withUser("guest").password(new BCryptPasswordEncoder().encode("123456")).roles("vip1");
}
}
thymeleaf整合SpringSecurity
-
导入Maven依赖
1
2
3
4
5
6
<!--thymeleaf-security整合包-->
<dependency>
<groupId>org.thymeleaf.extras</groupId>
<artifactId>thymeleaf-extras-springsecurity4</artifactId>
<version>3.0.4.RELEASE</version>
</dependency> -
修改我们的前端页面导入命名空间
1
xmlns:sec="http://www.thymeleaf.org/thymeleaf-extras-springsecurity4"
Thymeleaf的sec:authorize标签无效的解决方案
认证判断和角色功能块认证
1 | <!--如果未登录--> |
1 | <!-- sec:authorize="hasRole('vip1')" --> |
添加上记住我和首页定制
-
编写 Spring Security 配置类
1
2
3
4
5
6
7
8
9
10
11
12
13
14
15
16
17
18
19
20
21
22
23
24
25
26
27
28
29
30
31
32
33
34
35
36
37
38
39
40
41
42
43
44
45
46
47
48
49
50
51
52
53
54
55
56
57
58
59
60
61
62
63package com.kuang.config;
import org.springframework.security.config.annotation.authentication.builders.AuthenticationManagerBuilder;
import org.springframework.security.config.annotation.web.builders.HttpSecurity;
import org.springframework.security.config.annotation.web.configuration.EnableWebSecurity;
import org.springframework.security.config.annotation.web.configuration.WebSecurityConfigurerAdapter;
import org.springframework.security.crypto.bcrypt.BCryptPasswordEncoder;
/**
* TODO
*
* @ClassName Security
* @Author Alfa
* @Data 2022/7/11 11:51
* @Version 1.0
**/
//AOP
public class SecurityConfig extends WebSecurityConfigurerAdapter {
// 链式编程
// 授权
protected void configure(HttpSecurity http) throws Exception {
// 首页所有人可以访问,功能页只有对应有权限的人才能访问
// 请求授权的规则
http.authorizeRequests()
.antMatchers("/").permitAll()
.antMatchers("/level1/**").hasRole("vip1")
.antMatchers("/level2/**").hasRole("vip2")
.antMatchers("/level3/**").hasRole("vip3");
// 没有权限会默认到登陆页面,需要开启登陆的页面
//定制登录页.loginPage("/toLogin")
http.formLogin()
.loginPage("/toLogin")
.loginProcessingUrl("/login")
.usernameParameter("username")
.passwordParameter("password");
// 注销,跳到首页
http.logout().logoutSuccessUrl("/");
//防止网站攻击:get,post 关闭crsf功能 登陆失败可能存在的原因
http.csrf().disable();
//开启记住我功能,默认保存两周,自定义接收前端的参数
http.rememberMe().rememberMeParameter("remember");
}
// 认证,spring boot2.1.x可以直接使用
// 密码编码:PassWordEncoder
// 在springSecurity5.0+新增了很多的加密方式
protected void configure(AuthenticationManagerBuilder auth) throws Exception {
// 这些数据正常应该从数据库读
auth.inMemoryAuthentication().passwordEncoder(new BCryptPasswordEncoder())
.withUser("kuangshen").password(new BCryptPasswordEncoder().encode("123456")).roles("vip2","vip3")
.and()
.withUser("root").password(new BCryptPasswordEncoder().encode("123456")).roles("vip1","vip2","vip3")
.and()
.withUser("guest").password(new BCryptPasswordEncoder().encode("123456")).roles("vip1");
}
} -
前端表单login.html
1
2
3
4
5
6
7
8
9
10
11
12
13
14
15
16
17
18
19
20<form th:action="@{/login}" method="post">
<div class="field">
<label>Username</label>
<div class="ui left icon input">
<input type="text" placeholder="Username" name="username">
<i class="user icon"></i>
</div>
</div>
<div class="field">
<label>Password</label>
<div class="ui left icon input">
<input type="password" name="password">
<i class="lock icon"></i>
</div>
</div>
<div class="field">
<input type="checkbox" name="remenber">记住我
</div>
<input type="submit" class="ui blue submit button"/>
</form>
对狂神的shiro的学习总结
Shiro三大对象
Shrio核心三大对象
- Subject 用户
- SecurityManager 管理用户
- Realm 连接数据
shiro环境搭建
源码结构

-
pom.xml导入依赖
1
2
3
4
5
6
<!--shiro整合spring的包-->
<dependency>
<groupId>org.apache.shiro</groupId>
<artifactId>shiro-spring</artifactId>
<version>1.5.2</version>
</dependency> -
创建一个config包编写ShiroConfig配置类
代码如下:1
2
3
4
5
6
7
8
9
10
11
12
13
14
15
16
17
18
19
20
21
22
23
24
25
26
27
28
29
30
31
32
33
34
35
36
37
38
39
40
41
42
43
44
45
46
47
48
49
50
51
52
53
54
55
56
57
58
59
60
61
62
63
64
65
66
67
68
69
70
71
72
73
74package com.kuang.config;
import at.pollux.thymeleaf.shiro.dialect.ShiroDialect;
import org.apache.shiro.spring.web.ShiroFilterFactoryBean;
import org.apache.shiro.web.mgt.DefaultWebSecurityManager;
import org.springframework.beans.factory.annotation.Qualifier;
import org.springframework.context.annotation.Bean;
import org.springframework.context.annotation.Configuration;
import java.util.LinkedHashMap;
import java.util.Map;
/**
* ShiroConfig配置类
*
* @ClassName ShiroConfig
* @Author Alfa
* @Data 2022/7/13 9:30
* @Version 1.0
**/
public class ShiroConfig {
//ShiroFilterFactoryBean
public ShiroFilterFactoryBean getShiroFilterFactoryBean( DefaultWebSecurityManager defaultWebSecurityManager) {
ShiroFilterFactoryBean bean = new ShiroFilterFactoryBean();
//设置安全管理器
bean.setSecurityManager(defaultWebSecurityManager);
/*
* 添加shiro的内置过滤器
* anon:无需认证即可访问
* authc:必须认证了才能访问
* user:必须拥有记住我功能才能用
* perms:拥有对某个资源的权限才能访问
* role:拥有某个角色权限才能访问
*/
//拦截
Map<String, String> filterMap = new LinkedHashMap<>();
// 授权,正常情况下,未授权会跳转到未授权页面
filterMap.put("/user/add", "perms[user:add]");
filterMap.put("/user/update", "perms[user:update]");
filterMap.put("/user/*", "authc");
bean.setFilterChainDefinitionMap(filterMap);
//设置登陆的请求
bean.setLoginUrl("/toLogin");
// 设置未授权的请求
bean.setUnauthorizedUrl("/noauth");
return bean;
}
//DefaultWebSecurityManager:2
public DefaultWebSecurityManager getDefaultWebSecurityManager( UserRealm userRealm) {
DefaultWebSecurityManager securityManager = new DefaultWebSecurityManager();
//关联realm
securityManager.setRealm(userRealm);
return securityManager;
}
//创建realm对象,需要自定义:1
public UserRealm userRealm() {
return new UserRealm();
}
//整合ShiroDialect:用来整合shrio和thymeleaf
public ShiroDialect getShiroDialect() {
return new ShiroDialect();
}
} -
因为配置涉及到userRealm,这个需要自己自定义,所以在config包下再写一个UserRealm类
代码如下:1
2
3
4
5
6
7
8
9
10
11
12
13
14
15
16
17
18
19
20
21
22
23
24
25
26
27
28
29
30
31
32
33
34
35
36
37
38
39
40
41
42
43
44
45
46
47
48
49
50
51
52
53
54
55
56
57
58
59
60
61
62
63
64
65package com.kuang.config;
import com.kuang.pojo.User;
import com.kuang.service.UserService;
import org.apache.shiro.SecurityUtils;
import org.apache.shiro.authc.*;
import org.apache.shiro.authz.AuthorizationInfo;
import org.apache.shiro.authz.SimpleAuthorizationInfo;
import org.apache.shiro.realm.AuthorizingRealm;
import org.apache.shiro.session.Session;
import org.apache.shiro.subject.PrincipalCollection;
import org.apache.shiro.subject.Subject;
import org.springframework.beans.factory.annotation.Autowired;
/**
* 自定义的UserRealm extends AuthorizingRealm
*
* @ClassName UserRealm
* @Author Alfa
* @Data 2022/7/13 9:32
* @Version 1.0
**/
public class UserRealm extends AuthorizingRealm {
UserService userService;
//授权
protected AuthorizationInfo doGetAuthorizationInfo(PrincipalCollection principalCollection) {
System.out.println("执行了授权==>doGetAuthorizationInfo");
SimpleAuthorizationInfo info = new SimpleAuthorizationInfo();
//拿到当前登录的这个对象
Subject subject = SecurityUtils.getSubject();
//拿到user对象
User currentUser = (User) subject.getPrincipal();
//设置当前用户的权限
info.addStringPermission(currentUser.getPerms());
return info;
}
//认证
protected AuthenticationInfo doGetAuthenticationInfo(AuthenticationToken token) throws AuthenticationException {
System.out.println("执行了认证==>doGetAuthorizationInfo");
UsernamePasswordToken userToken = (UsernamePasswordToken) token;
//连接真实的数据库
User user = userService.queryUserByName(userToken.getUsername());
if (user == null) { //没有这个人
return null; // UnknownAccountException
}
//登录成功之后把对象存入session
Subject currentSubject = SecurityUtils.getSubject();
Session session = currentSubject.getSession();
session.setAttribute("loginUser",user);
//可以加密,MD5 ,MD5盐值加密
//密码认证,shiro做
return new SimpleAuthenticationInfo(user,user.getPwd(),"");
}
}
记录一次shiro验证密码时,输入正确密码仍然提示不正确的问题
把int类型转换成字符串问题就解决了

Shiro-thymeleaf整合
-
导入Maven依赖
1
2
3
4
5
6
<!-- shiro-thymeleaf整合包 -->
<dependency>
<groupId>com.github.theborakompanioni</groupId>
<artifactId>thymeleaf-extras-shiro</artifactId>
<version>2.1.0</version>
</dependency> -
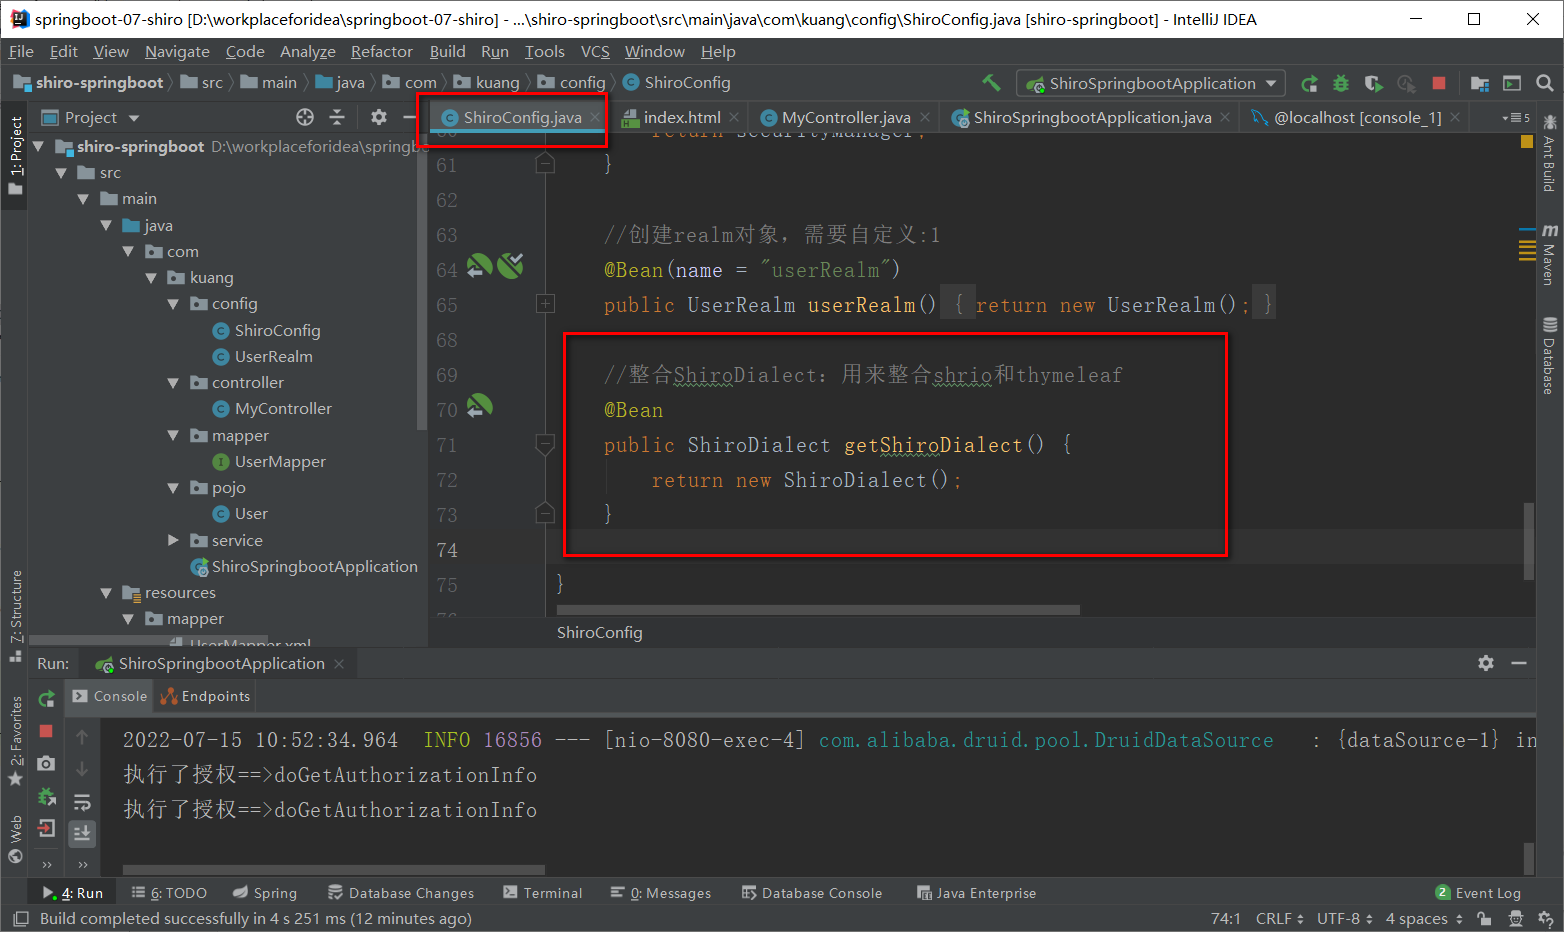
编写配置类
1
2
3
4
5
//整合ShiroDialect:用来整合shrio和thymeleaf
public ShiroDialect getShiroDialect() {
return new ShiroDialect();
}
-
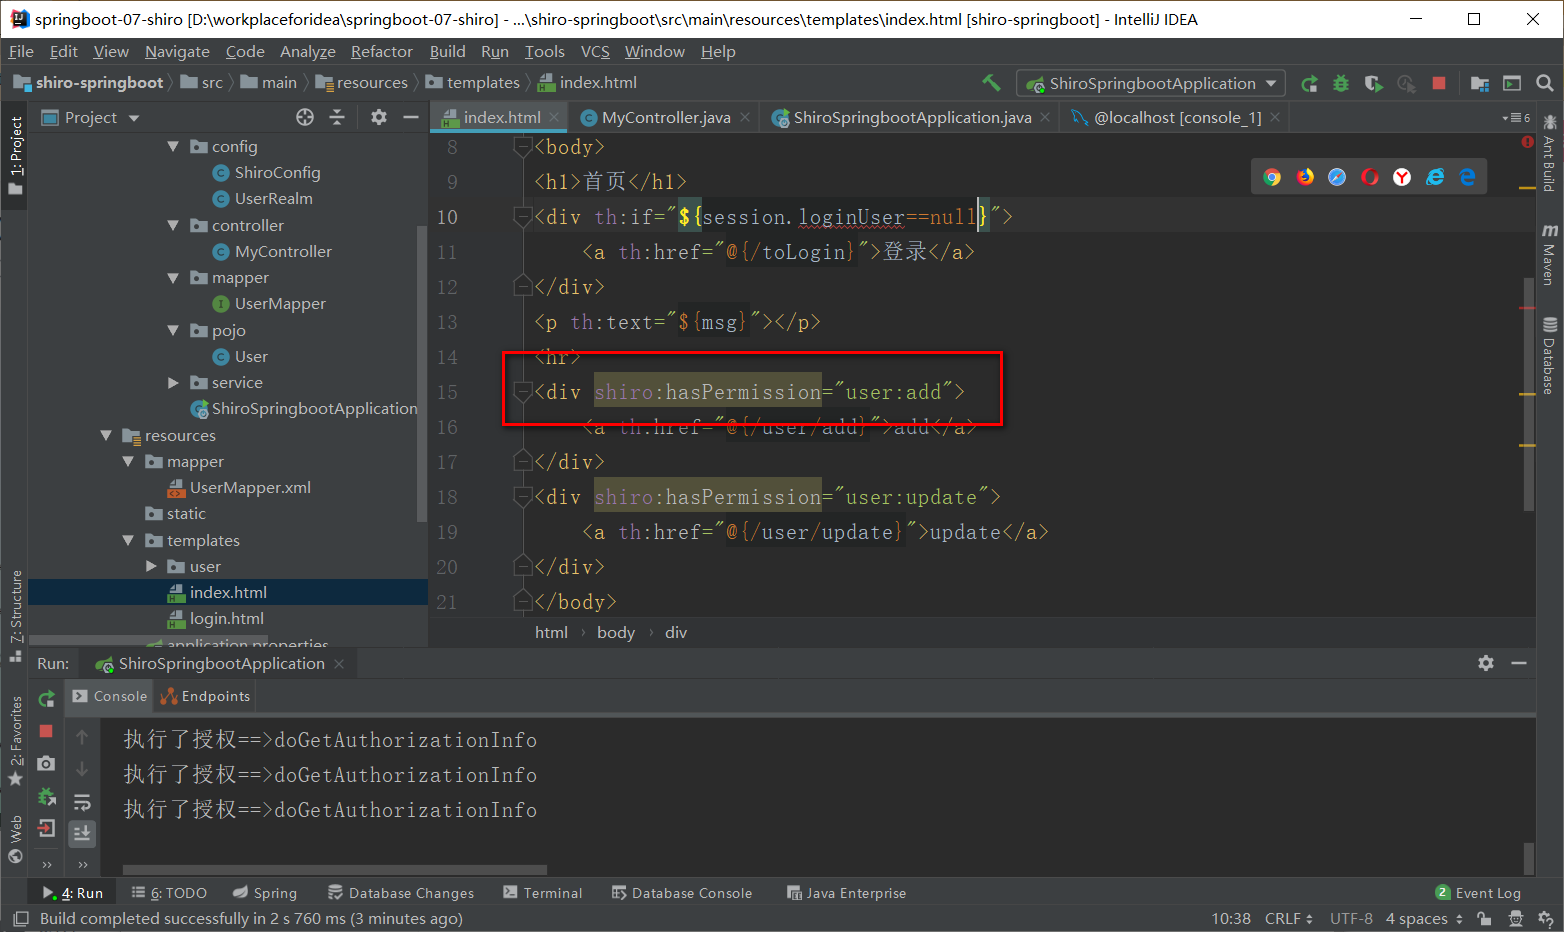
前端页面添加约束
xmlns:shiro="http://www.thymeleaf.org/thymeleaf-extras-shiro" -
shiro-thymeleaf标签

本博客所有文章除特别声明外,均采用 CC BY-NC-SA 4.0 许可协议。转载请注明来自 小蜗!
评论
ValineDisqus


